Configuring Services
This article only applies to resources based on 1st Gen shells. While CloudShell supports 1st Gen shells, we recommend using 2nd Gen shells, which offer enhanced shell management capabilities. For details, see Shells Overview.
In this article:
Creating a service catalog category
To make the service available to users of a specific domain, you must create a service category for that domain and then associate the service family to this service category. This is a two step process: first create a service category that can access the domain, and then attach the service category to the service.
Creating a service category for a domain
To create a service category:
- Log in to CloudShell Portal as system administrator.
- In the main menu, click Manage.
- In the left pane, click Categories.
-
To create a new category click Add New Category.

The Add New Category dialog box is displayed. -
Enter the required information:
Field
Required
Description
NAME
Required
Category name that displays in the catalog.
DESCRIPTION
Optional
Description of the category.
CATALOG
View only
The type of category, selected automatically according to categories view selection
LOCATION
Optional
Determines if the current definition is a category or sub-category:
If you leave the selection with slash (‘/’), then this definition is a Category.
If you select a value, then this definition becomes a sub-category of the selected category.
DOMAINS
Optional
Select the domain or domains where the category will be available.
If you are a domain administrator, the selected domain is displayed but cannot be changed.
If this category is a sub-category, this field inherits the domain values that were selected for the main category. The sub-category can be displayed in less domains than the main category. However, additional domains cannot be added.
IMAGE
Optional
You can add an image to the catalog definition. The recommended size for the image is 190x120 pixels (image size is limited to 400x400 pixels or 200Mb).
- Make sure to select the required domain.
- Click Save.
Creating a service resource family
A service family is a special type of resource family. A service family can hold one or more services of the same type. Service families, and the services under them, are created in the Resource Manager by the administrator.
To create a service resource family:
- Open Resource Manager Client with administrator credentials.
-
In the Admin tab click Resource Families.
-
In the Resource Families explorer, right-click Resource Families, select New and then click Resource Family.
-
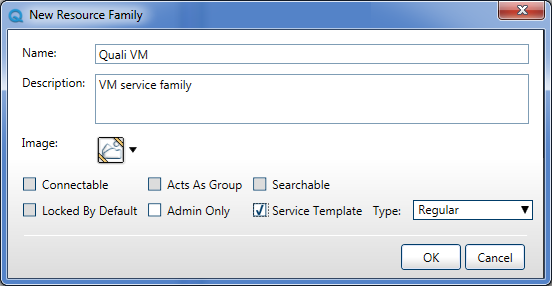
In the New Resource Family dialog box, in the Name field, enter the name of the resource family.
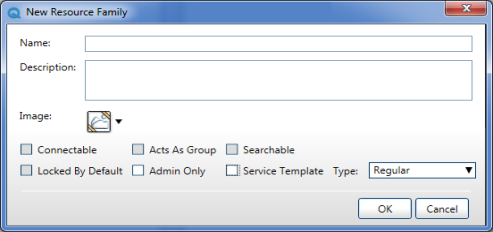
- You can optionally enter a Description and provide an Image for the new resource family for services. The maximum allowed image size is 240 KB but it is recommended to use 32x32 pixel icons.
-
Select the Service Template check box and from the Type dropdown list that is displayed to the right of the check box, select Regular.
- Click OK.
A new service resource family is created.
The new service resource family displays in the Resource Families explorer. In the list of resource families, the service icon ![]() displays alongside the name of the service family, distinguishing it from other resource families.
displays alongside the name of the service family, distinguishing it from other resource families.

Managing attributes, rules and categories for service families
In Resource Manager Client, in the Parameters workspace of a service family, you can manage the attributes, rules and categories and perform the following actions:.
- Associate attributes and rules to be inherited by all the services of this family.
- Link the service family to one or more categories .
Note: Services only display in the services catalog in CloudShell Portal if the resource family of that service is linked to a service category.
To manage service families parameters:
-
In Resource Manager Client, in the Admin tab, click Resource Families.
-
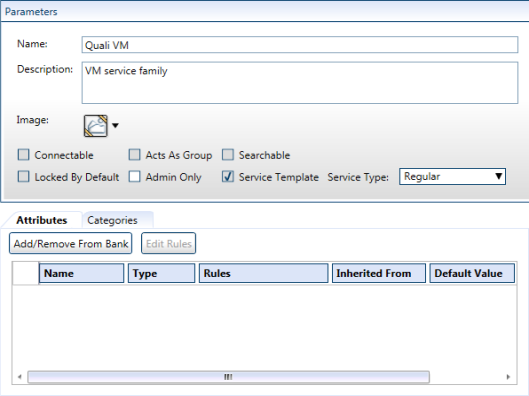
In the Resource Families explorer, select the required service family. For the purposes of this procedure, the Quali VM service family is selected.

The details of the service family display in the Parameters workspace.
-
To associate an attribute, in the Attributes tab, click Add/Remove From Bank.
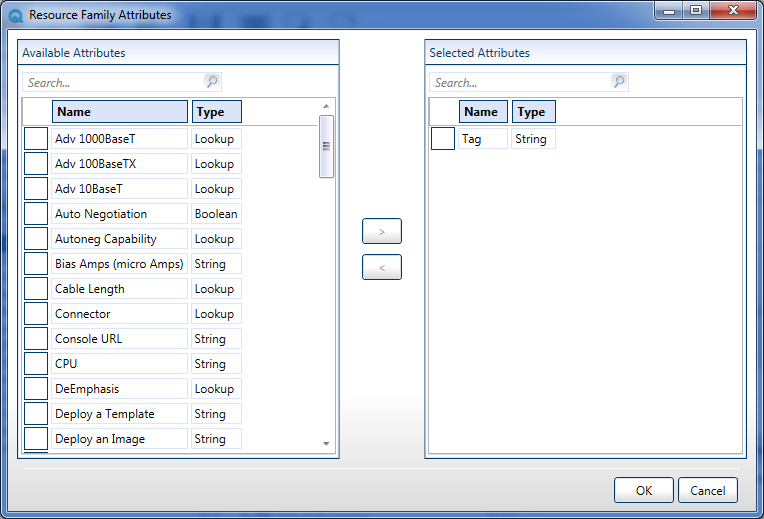
- In the Resource Family Attributes dialog box, select the required attributes and click OK.
-
To apply rules to the attribute, select the attribute in the workspace.

-
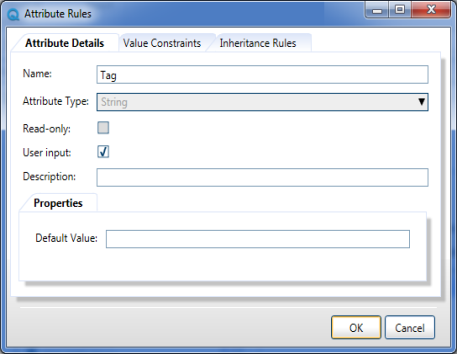
Click Edit Rules.
-
In the Attribute Rules dialog box, specify the required rules and click OK.
Important: The attribute inheritance feature will be deprecated in an upcoming release. Please do not use this setting. For additional information, see Configuring attribute inheritance settings or contact Quali Support.
-
To link the service family to a domain category, in the Categories tab click Add.

-
In the Select Category dialog box, select the required categories and click OK.

The selected categories display in the Categories dashboard.
Creating a service
Services are created under the service families to which they belong. New services are created in Resource Manager using the New Resource Model dialog box.
To create a new service:
- In Resource Manager Client, in the Admin tab, click Resource Families.
- In the Resource Families explorer, right-click the required service family within which to create the service. For the purposes of this procedure, the Quali VM service family is selected.
- Select New and then click Resource Model.
-
In the New Resource Model dialog box, enter the name and description of the service.
-
Click OK.
The new service is created and displays in the Resource Families explorer under the service family to which it belongs.

Configuring service attributes
To configure service attributes
- In the Resource Families explorer, select a service and in the Parameters pane select the Attributes tab.
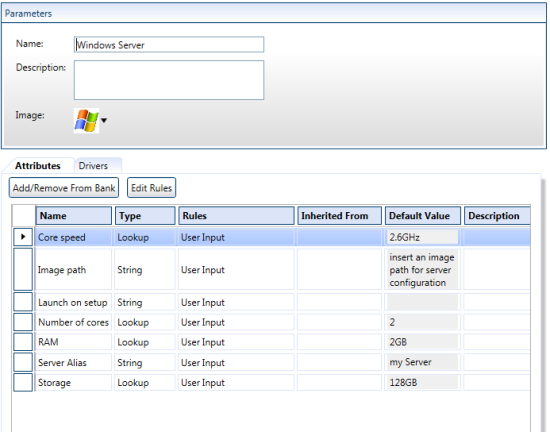
- To associate attributes or remove existing attributes, click Add/Remove From Bank.
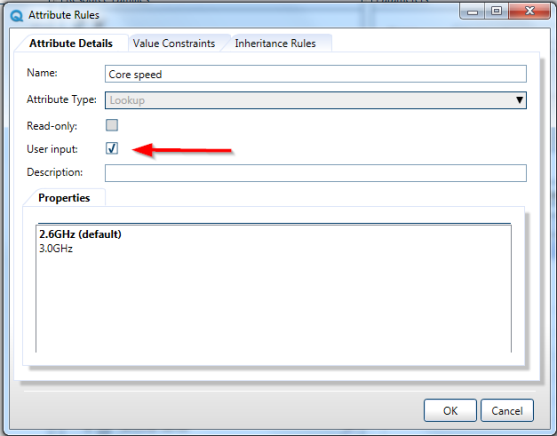
- To set a default attribute value or mark an attribute as user input, click Edit Rules.
User input attributes are presented to the user when adding a service to a blueprint or a sandbox. The user is then prompted to update the attribute values.
Associating a driver to a service
Service driver commands can be executed manually by the user while the sandbox is active, or automatically by the blueprint driver on blueprint setup and teardown.
To associate a driver to a service:
- From the Resource Families explorer, select the required service.
-
Select the Drivers tab.

- Click Add/Remove from bank.
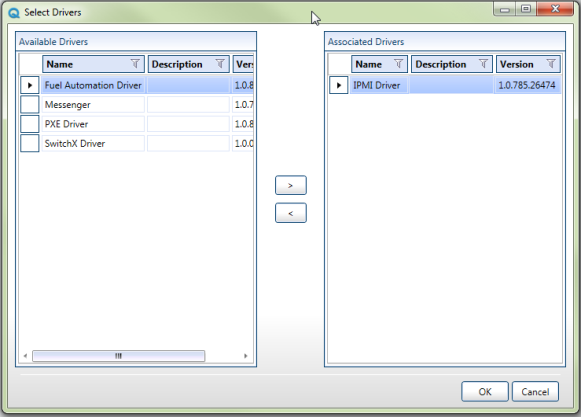
- In the Select Drivers dialog box, select the drivers to associate with the service.
- Click OK.
The service’s Properties pane is displayed.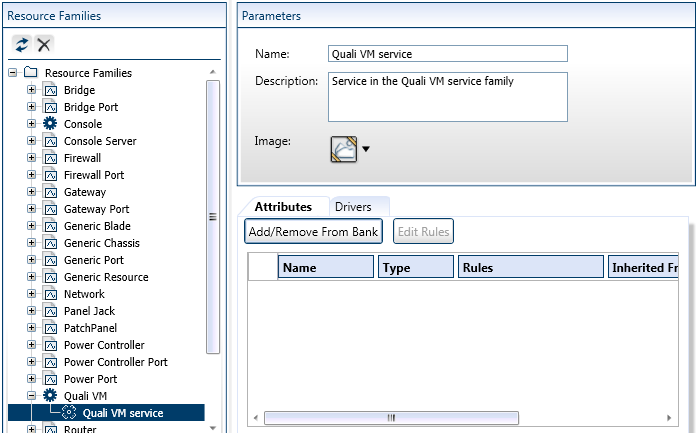
Associating a script to a service
Scripts are associated to service models in the Resource Scripts page of the Manage dashboard of the CloudShell Portal. See Managing Assets.
