Add Instructions
The instruction sidebar can be helpful in explaining the concepts and usage of the blueprint to the end user. The instruction section is fully customizable and can include more complex text formats than the description, images, embedded videos as well as other media.

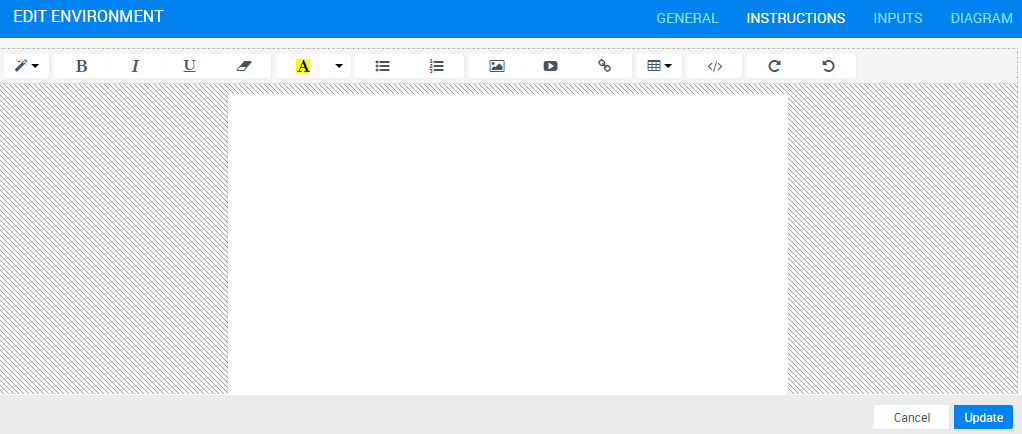
The instructions editor is a full featured rich text editor that can include embedded video links, presentations and images and can even contain custom HTML code. Any instructions you create will be visible to the end user in the Instructions sidebar when viewing the blueprint's diagram or the sandbox diagram.
Note: CloudShell admins can configure the Instruction pane to open by default and change the pane's width - see Specifying which side panes should be open by default and Defining the Instructions pane size.
To add instructions to your blueprint:
- From the Blueprint menu, select Properties.
- On the right side of the catalog header, click Instructions.
-
Enter instructions using the different options in the toolbar.
The table below lists the options available:

Apply font styles to your text 
Make your text bold 
Italicize your text 
Underline your text 
Remove font styles

Apply text and background color 
Create a bulleted list 
Create a numbered list 
Add an image 
Add a video 
Add a hyperlink 
Add a table 
Display instructions in HTML code 
Redo typing 
Undo typing - Click Update.
How to import instructions from an external HTML file
This section explains how to display the contents of an HTML file in the Instructions pane.
Using an external HTML file allows you to utilize additional HTML capabilities. For example, creating tabs in your Instructions pane, each with different contents. To learn how to do this, see the Community Forums article on "how to create tabs in a blueprint's Instructions pane".
To change the instructions to point to an HTML:
- In the Portal installation folder, create a folder called "Instructions". For example: C:\Program Files (x86)\QualiSystems\CloudShell\Portal\Instructions.
- Add the instructions HTML file to this folder, and rename it to "index.html".
-
In the blueprint's Instructions page, click
 and add the following line:
 <iframe src="/Instructions" scrolling="yes" frameborder="0" height="100%" width="100%"></iframe>
