Creating a Configuration Role in Windows Failover Cluster
To create a configuration role:
- Open Windows Failover Cluster Manager.
-
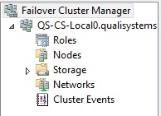
Right-click Roles and select Configure Role.

- Click Next, select the Generic Script option, then click Next.
- Enter the path to the CloudShell Portal.vbs file (for example: c:\Quali\Portal.vbs).
- Enter a name for the role and click Next.
-
Click Next to complete the wizard.
This creates a new role that starts to run.

To configure the CloudShell Portal virtual front with Quali Server:
- In Cluster Manager, open the Roles window.
- Click the CloudShell Portal role.
-
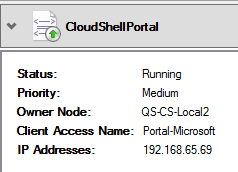
At the bottom of the page, locate the IP address of your CloudShell Portal virtual front.
For example, when using Windows cluster to cluster CloudShell Portal, the information in the following image is displayed:

In this example, CloudShell Portal's virtual IP is: 192.168.65.69.
- Define the virtual front address on all Quali Server nodes:
- Navigate to one of the Quali Server nodes.
- Go to the C:\Program Files (x86)\QualiSystems\CloudShell\Server folder and open the customer.config file
- Add the following key to the file. This key sets the virtual front address to be used in emails sent from CloudShell to users.
<add key="PortalAddressLinkForEmails" value="protocol://PublicServerName:PortalPort"/> Modify the key's values:
Parameter Parameter details protocolhttp or https if CloudShell Portal is set to use SSL PublicServerNameThe DNS name or IP address of the CloudShell Portal virtual front PortalPortThe port which CloudShell Portal is using (If the port is 80 or 443, remove this parameter and the colon from the key) - Repeat steps a-d for each Quali Server node in the cluster.
- Move the role between all nodes – see Moving a WSFC Role between Nodes.
